

How to create Calculator in java
Hello friends my name is Pintu Vashishtha and today i am telling about calculator in this article, we will be learning how to create a advanced Calculator Program in Java by using the NetBeans IDE.

Creating a Calculator Project...
To create and run a program, you have to first create a project. Here are the steps to create a calculator project.
Step 1:- Choose File, New Project to display the New Project Dialog box.

The new project box enables you to specify the project type.
Step 2:- Choose the Java type from the given list.
Step 3:- From the New Application Tab, Enter the project name it MiniCalculator and Uncheck the Main class option from the project tab.
Step 4:- To add a Jframe, right click the project name in the Project window and The Jframe class name give MyCalculator.

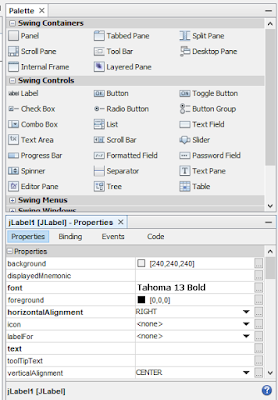
Step 5:- To the right of the Jframe, there is a Palette with a set of controls on it. Click the Label and apply it on the blank Field form. Now click Properties, then change the Label to blank. Click on the Code and change the Variable Name to Label.
Step 6:- To the right of the Jframe, there is a Palette with a set of controls on it. Click the Text Field and apply it on the blank Field form. Now click Properties, then change the text field to blank. Click on the Code and change the Variable Name to Display.
Step 7:- Select the two Radio Button and drag it to the Jframe form. Change the text and the Variable Name to ON and OFF.
Step 8:- Select the Button and drag it to the Jframe form. Change the text and the Variable Name as we did for the Label.
Step 9:- Change the Variable Name to Button1 as we did fo r the text Field. Enter the value 1 for the text by selecting the properties. Do the same for all the buttons by changing the text and the Variable Name.
The Final JFrame structure will be formed.

Step 10:- Double click on any of the button. This will take the user to the source section where the major coding of the program is done. The image below depicts the Source section.

Step 11:- Declare the following variables inside the main class.
The num1 term is to accept the first number entered, whereas the num2 is to accept the second number stored. The variable result is used to store the output value.
Step 12:- Declare the following code inside the MyCalculator function.
Step 13:- Declare the Enable and Disable function Below MyCalculator function and Both functions are opposite of each other.

Writing Code for the Number Button on MyCalculator
To get a text from a form object, you can use the getText method of the object (if it has one). So to get the text from Button1 we could use this code.
Similarly, for the Button2 and all the Button, We could use the similar code:

Arithmetic Codes for the Button
The code for the Addition operation is as shown below. The valueOf statement is used in order to convert the string argument as a signed decimal integer.
The number entered into the EditText textbox is taken from the EditText and stored temporarily in a variable.
Therefore the getText() method can be used to retrieve the data, and the setText() method to display the data. The elsewhere Float.valueOf() method will throw a “NumberFormatException” error if the String provided is not a proper number.
Similarly, do this for all the other logics to be performed. For each logic, the operation to be performed is clearly stated.

The Equal action button performs according to the required logic. For this, we make use of the if statements. If the user prefers addition, the num1 and the num2 will be added and the answer will be stored in the result.

The Clear button is used to remove the previously used values from the Label and Display.

The Del button is used to remove the previously used values from the Label and Display. For this the num2 will be set to 0 and the textField must be set to blank.

The Radio button is used to Enable and Disable the Calculator

Now, Save the file and click the Run button. Run button is look like this ➤.
The JFrame panel will appear as shown.

Enter the first number and second number followed by the logic to be applied. Now click the Equal action button. The result will be displayed on the text Field.
The addition operation has been performed successfully. The rest of the arithmetic operations can be performed in a similar manner.
Conclusion:- We hope you enjoyed this informative article on how to create a calculator in Java by using Netbeans IDE .


0 Comments
Please do not enter any spam link in the comment box.